By setting up the link with Zoom, you can use Tebanasu more conveniently.
Specifically, you will be able to use the following features:
- Automatically issue different URLs for each meeting
- Automatically record and save the content of the meeting to the cloud
- Share the meeting video with customers
How to Login
Please login to Tebanasu using the login information provided with the “Test account and credentials.”
How to Set Up
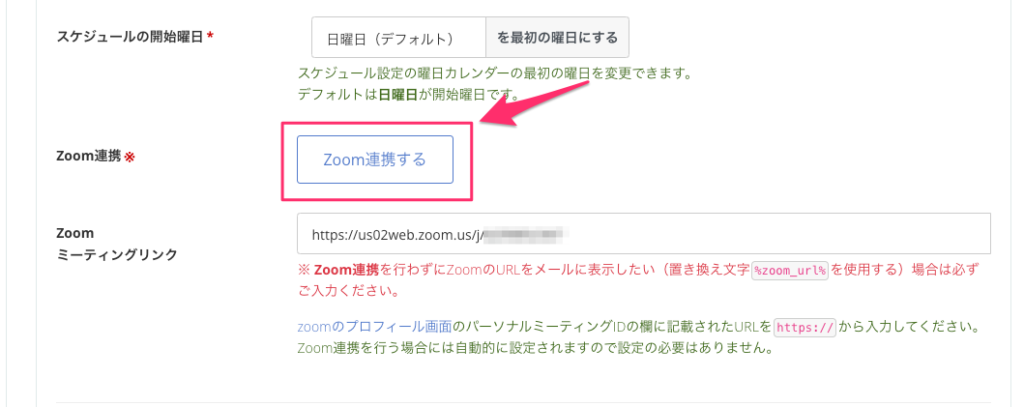
1. Open “Profile Settings” – “Basic Information“.
2. Click the [Link with Zoom] button.
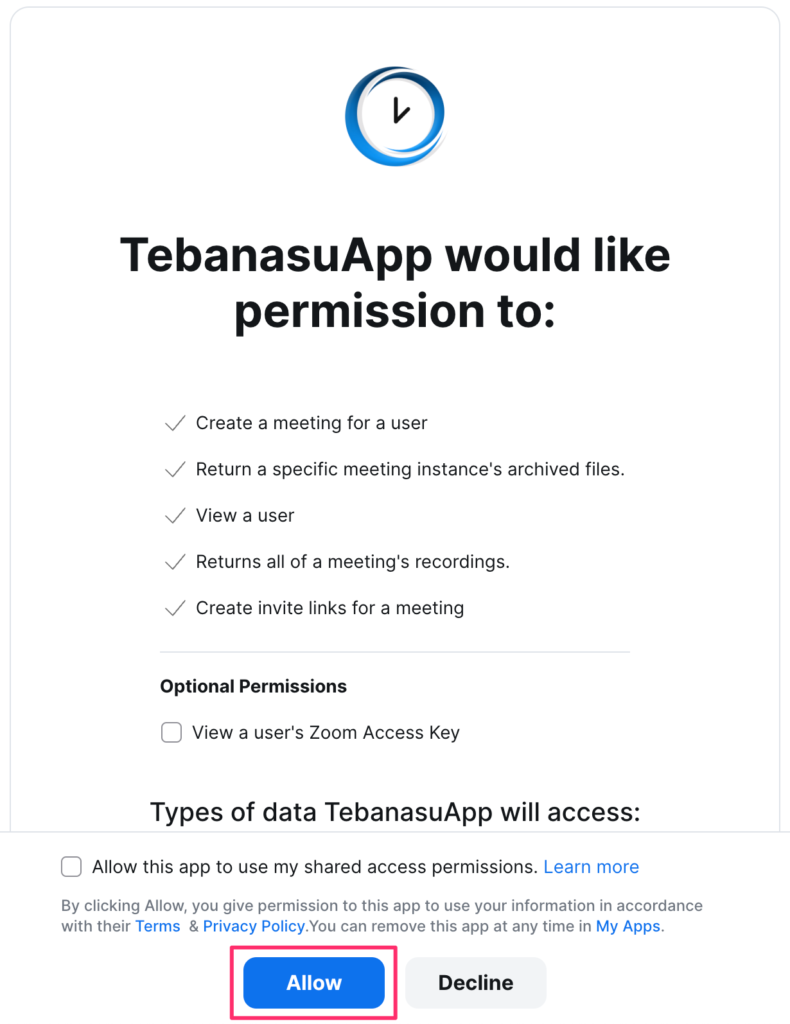
3. A confirmation screen for permissions will be displayed. Please click [Allow].
*If the Zoom sign-in screen is displayed, it will appear after you sign in.
*The “Optional Permissions” and “□ Allow this app to use shared permissions.” and the checkbox does not need to be checked.
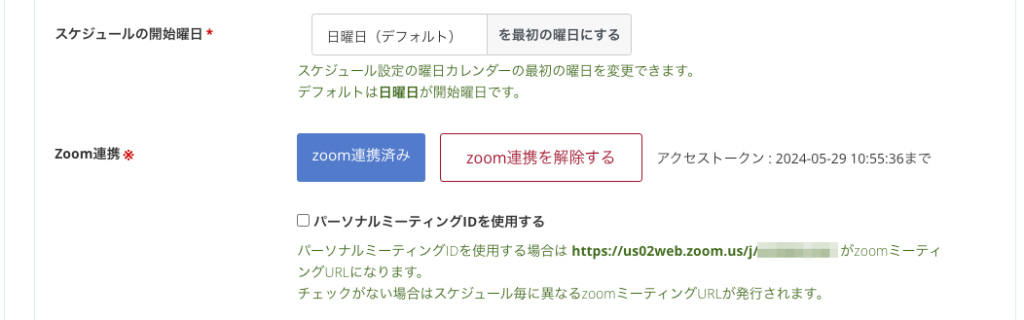
When you return to the Tebanasu screen, if the button says [Linked with Zoom], the linkage is complete.
After the above settings, reservations made will be linked with Zoom.
If you want to test, please follow the steps below to make a reservation yourself.
Creating a Test Reservation
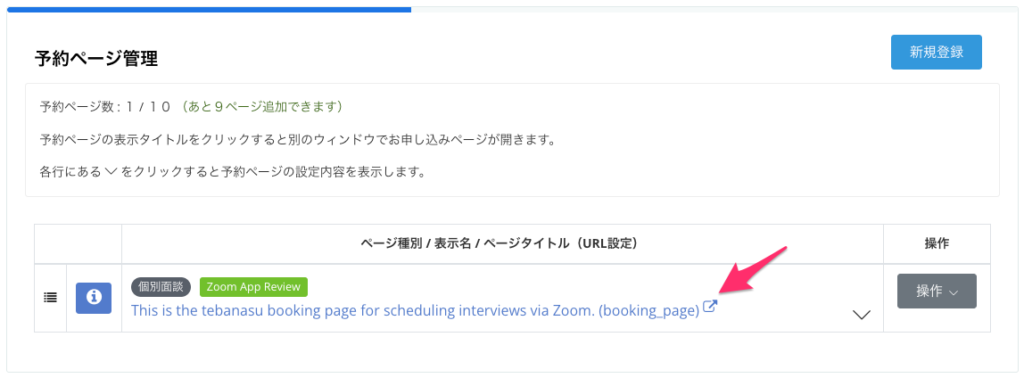
1. Open “Booking Page Management“.
2. Click the title of the booking page.
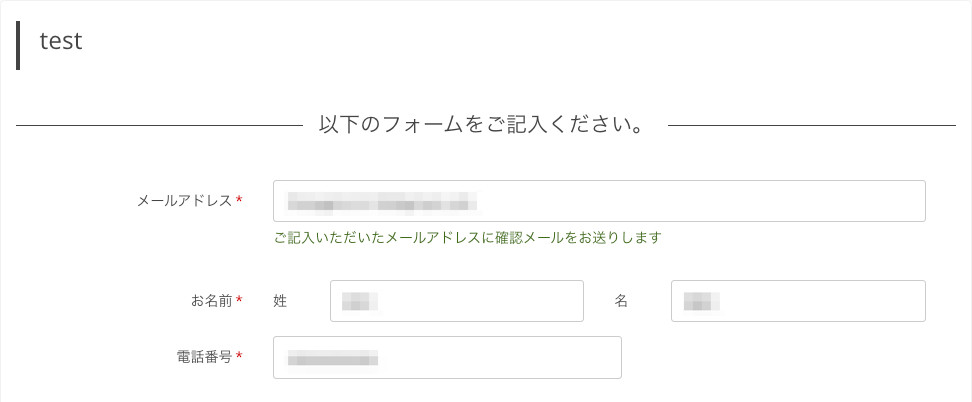
3. Enter the applicant information on the opened reservation page.
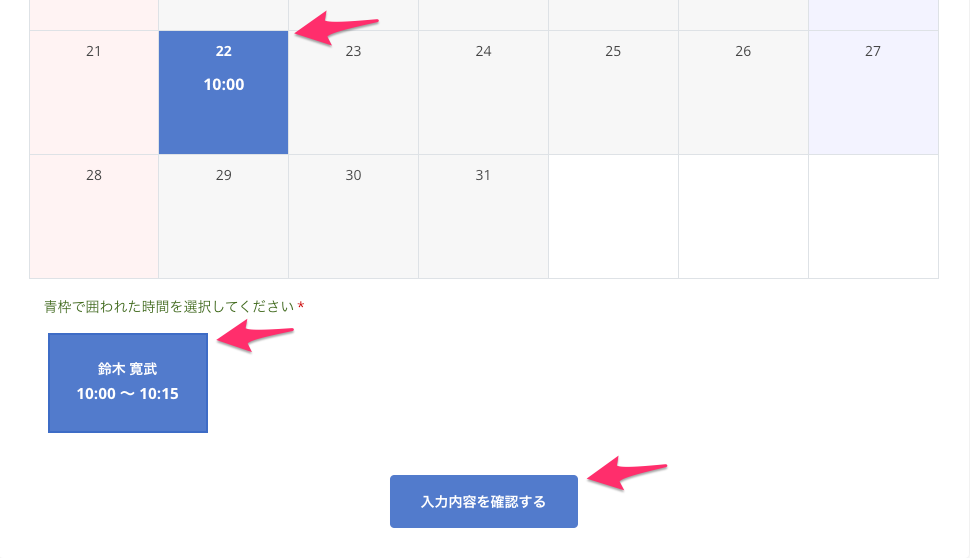
4. Click the date set in step 4 from the calendar, select a time slot displayed at the bottom of the screen, and click [Confirm Input Details].
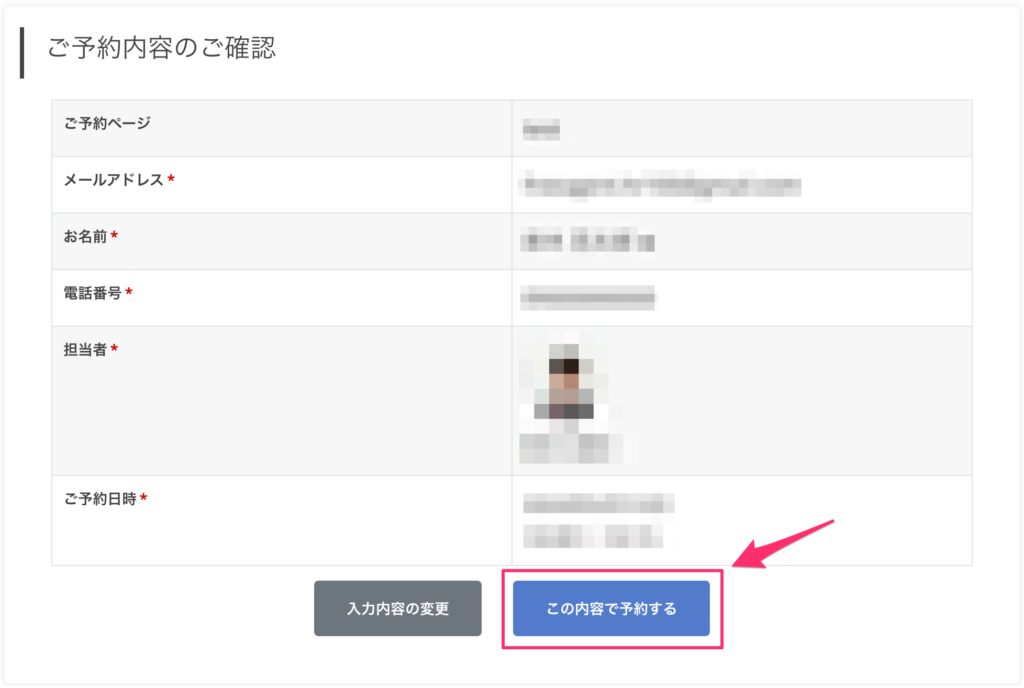
5. A confirmation screen for the reservation details will be displayed. Click [Book with this information].
The test reservation is completed with the above steps.
Automatically Issue Different URLs for Each Meeting
If the box “□ Use Personal Meeting ID” is unchecked, a different URL will be automatically issued for each meeting.
If checked, the Personal Meeting ID will be used, allowing meetings with all customers using the same URL.

When issuing different URLs for each meeting, make sure to join the same meeting room as the customer to conduct the meeting.
To ensure you join the same meeting room, it is recommended to start Zoom from the “Schedule List” in Tebanasu.
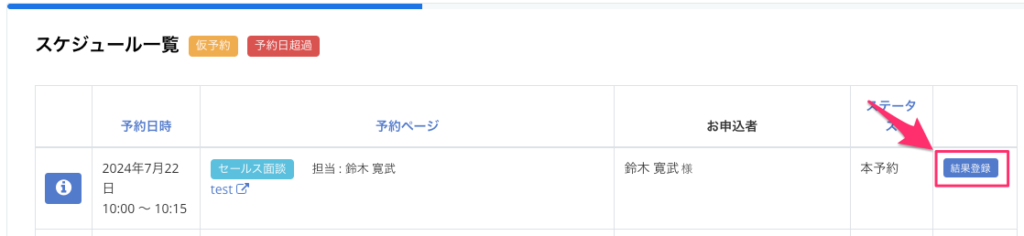
1. Open “Schedule List“.
2. Click the [ i ] icon to the left of the meeting to be held.

3. The “Booking Details” screen will open. Click [Open zoom.us].
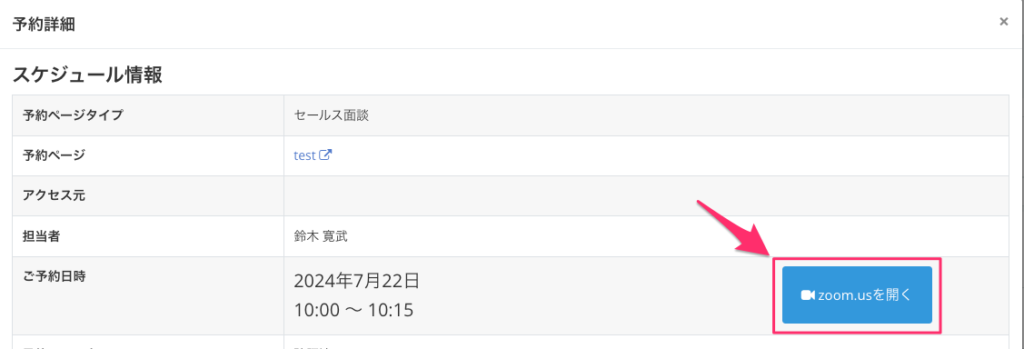
This operation will allow you to open Zoom with the URL notified to the customer, preventing you from joining a different meeting room from the customer.
Share Meeting Videos with Customers
By linking with Zoom, the meeting will be automatically saved to the Zoom cloud.
You can share this video with customers, providing comprehensive follow-up by using it together with the report.
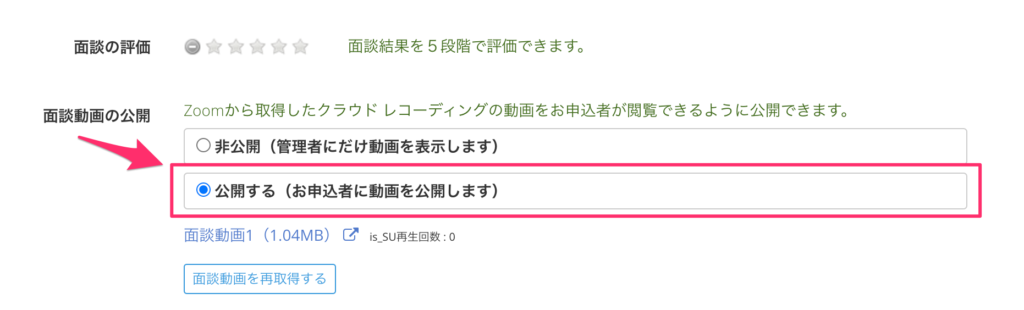
You can choose to make the meeting video public or private. If set to public, the customer can view the video from the report after the meeting.
*You need to check “□ Send email to the applicant when registering results” and “□ Use meeting result report function” in the reservation page settings.
To make the video public, set it from the “Register Results” screen.
1. Open the “Schedule List“.
2. Click [Register Results] for the meeting.
3. The “Booking Details” screen will be displayed. Select “Make Public” in the “Meeting Video Public” section.
*Clicking the video link will allow you to check the video (counted as a view).
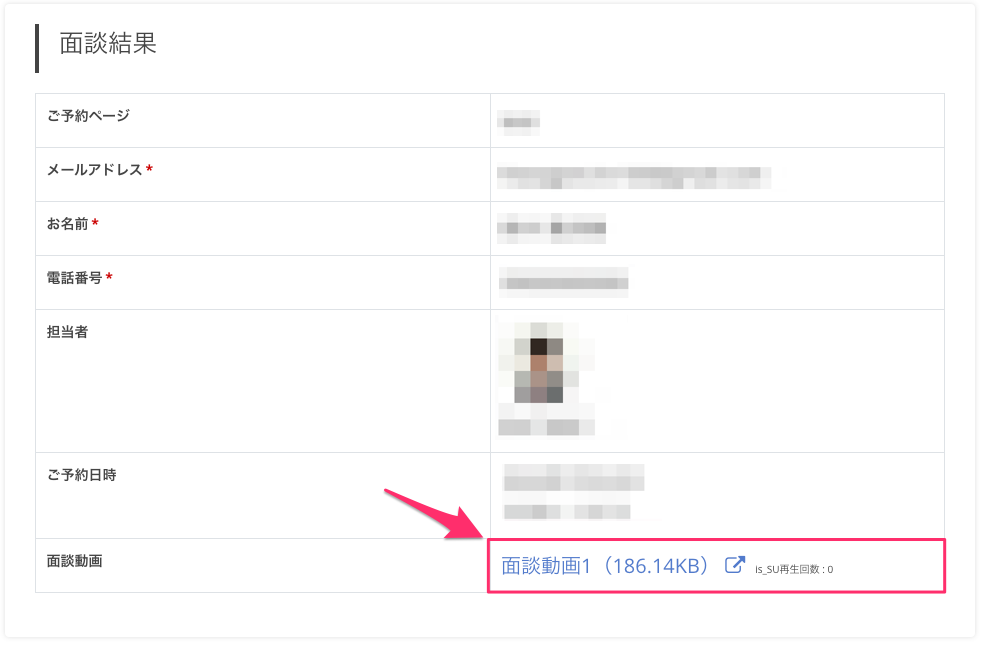
If you send the meeting result report to the customer after setting it to public, the “Meeting Video” item will be displayed on the report screen, allowing the customer to view the video from the link.
*This will not be displayed in the test application on this page as it requires prior configuration to send an email upon result registration.
In Case of
Video Not Created Yet
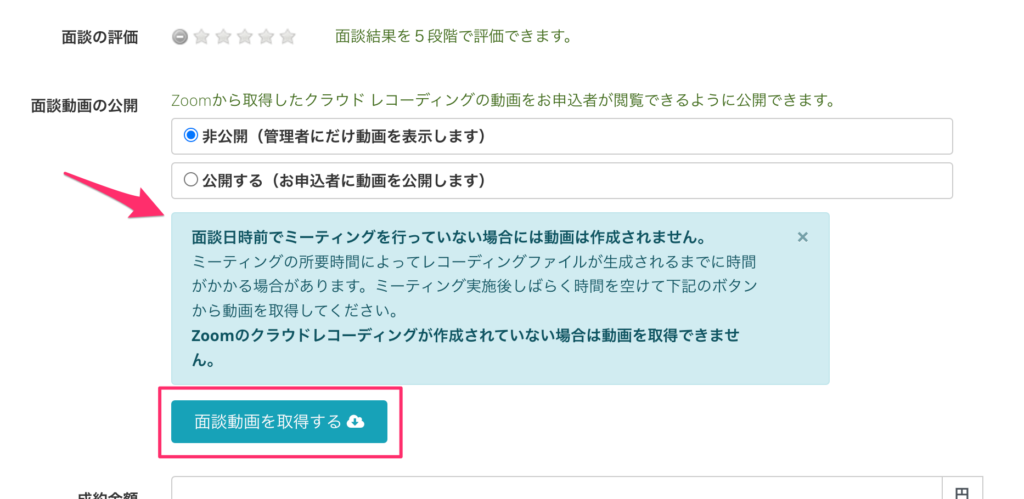
※If a meeting is not held prior to the interview date and time, no video will be generated.※Until the recording data is created on the ZOOM side, the recording file will not appear on the tebanasu results registration screen.
It takes about the same amount of time as the meeting duration to save to the cloud, so it takes time to reflect in Tebanasu.
Please confirm that the recording has been created on the ZOOM Management screen before displaying the Result Registration screen.
If the following message appears, please click the [Get Interview Video] button below to get the video a few minutes after the recording is created on the ZOOM side.
When Video is Not Reflected
When Video is Reflected

How to Disconnect Integration
If you wish to disconnect the integration with Zoom, please follow the steps below.
1. Open “Representative Settings” – “Basic Information“.
2. Click on the [Disconnect Zoom Integration] button in the “Zoom Integration” section.
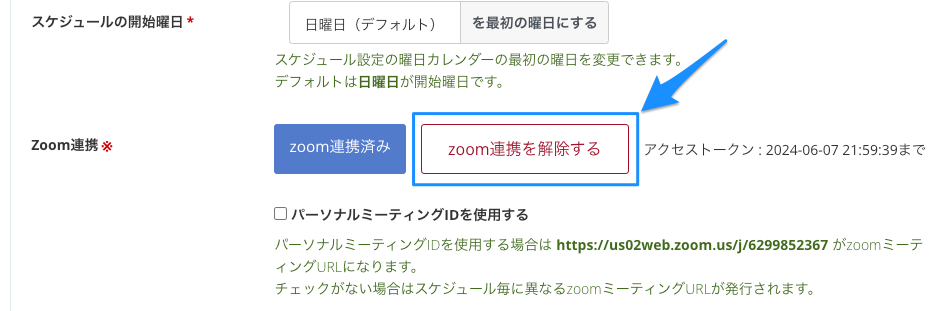
After clicking, a message saying “Zoom integration has been disconnected” will appear within a few seconds.
If the “Zoom Integration” section on the screen only shows the [Connect Zoom Integration] button, the disconnection has been successfully completed.